
Are you tired of high costs and tedious travel just to get a taste of adventure?
I get it. The barriers to genuine outdoor experiences can feel overwhelming.
But what if I told you that you can create your own thrill right at home?
This guide will help you to design and build your own diy obstacle courses that can rival any professional setup.
With years of hands-on experience in outdoor living and exploration, I know the ins and outs of creating engaging and safe challenge courses.
You’ll learn to transform your ordinary backyard into a changing proving ground, no matter your skill level.
I’ve guided countless enthusiasts to embrace the spirit of nature exploration, and I want to share that knowledge with you.
By the end of this article, you’ll have the confidence to forge your own adventure.
Let’s dive in and get started on your journey to outdoor excitement.
Unleash the Wild: DIY Obstacle Courses
Building diy obstacle courses in your backyard is more than just hammer and nails. It’s an experience. You get accessibility on your doorstep.
Forget the gym fees. You determine the layout, so it’s cost-effective and customizable to hone exactly what you want (balance,) strength, agility, or maybe problem-solving (perfect for those with a strategic mind).
Ever notice how being outside is a total mood lifter? These courses yank us away from screens and shove us into nature. Even a simple setup in the yard connects you to the wild.
The mental toughness you gain is gold. Real-world outdoor scenarios? You’ll be ready.
And let’s not forget the social side. Invite family for a bonding session or challenge friends to a mini-competition. It’s a great warm-up for bigger events like races or treks.
Your backyard becomes a mini-wilderness training ground (not just swing sets and slides). It’s rugged. It’s real.
It’s a project with a payoff that goes beyond the physical.
Blueprint for Adventure: Planning & Safety Essentials
Planning a diy obstacle course? Start by scouting the site. Find terrain that’s suitable and safe.
Think about rocks, roots, and unstable ground. It’s not just about space, though (although that’s key). You need clear pathways.
Why? Because tripping hazards aren’t fun for anyone.
Safety first, always. Proper spacing between elements is non-negotiable. You want soft landing zones, like mulch or sand.
And anchor points? They better be secure. Supervision protocols, especially for the little ones, are a must.
It’s not just about rules; it’s about preventing accidents.
Let’s talk materials. Reclaimed timber, sturdy ropes, and metal hardware are your friends. They last.
Natural elements like large rocks or logs add character and challenge. Avoid flimsy stuff. It won’t hold up, and that’s a safety risk.
Sustainable choices win every time.
Tools and gear are next. Basic carpentry tools, digging implements, and measuring tape are essentials. Don’t forget safety gear like gloves and eye protection.
Trust me, you’ll need them.
Communication is key. Make sure everyone using your course knows the rules and safety precautions. It’s not just for their safety, but yours too.
For more adventurous ideas, check out these family backyard camping ideas. They blend fun with safety, just like your obstacle course should. Remember, adventure is about exploring and enjoying, not getting hurt.
Happy building!
Crafting Rugged Obstacles: From Logs to Ropes
Building diy obstacle courses is a blast. But don’t just throw some stuff together and call it a day. Let’s talk balance beams and log walks.
Logs or timber planks can be secured with ease, but the trick is in varying heights and widths. You want challenge? Start low and go higher.
Ground stability is key, or you’ll end up with a wobbly mess.
Now, rope swings and Tarzan vines. The jungle isn’t just for Tarzan. You need strong, rot-resistant ropes.
Anchoring them securely to strong tree limbs or sturdy frames is non-negotiable. Knot tying isn’t just for sailors. Get it right, or someone’s going for a swim (not the fun kind).
Load testing ensures your setup can take the weight. Yours and your friends.
Old tires aren’t just landfill fodder. Turn them into tire hurdles and crawl tunnels. Stack them up for jumping or stepping challenges.
Crawl tunnels? Use culverts, heavy-duty tarps over frames, or even large drainage pipes. It’s all about creativity and a bit of sweat.
Climbing walls and rope ladders? Keep them low-height (unless you fancy broken bones). Plywood and bolted-on holds make for a simple climbing wall.
Rope ladders need sturdy rungs. Falling isn’t fun, so prioritize fall zones. Trust me, you’ll thank yourself later.
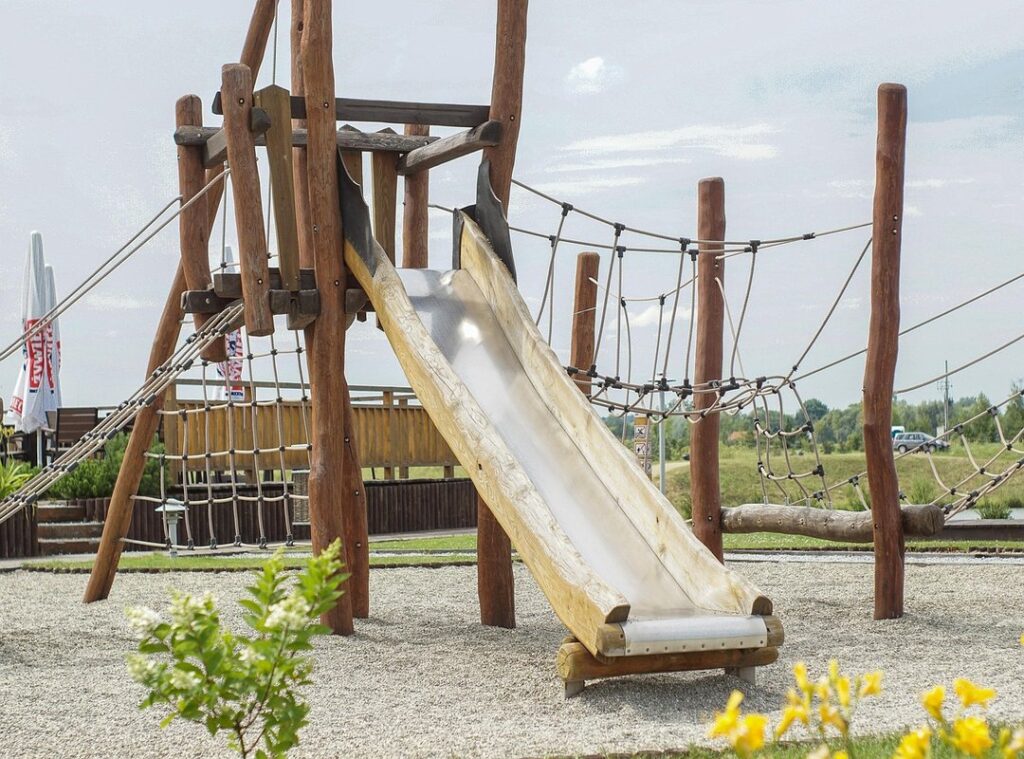
Ever tried net crawls or web obstacles? Suspend cargo nets or create woven rope webs between posts or trees. Tension and secure attachment points are your best friends here.
Slack nets are no good for anyone.
Integrating natural space features is where the magic happens. Use slopes, existing trees, whatever you’ve got. It enhances the ‘natural’ feel and adds a rugged charm.
Who needs a gym when you’ve got nature’s playground?
Remember, it’s not just about building obstacles. It’s about crafting an experience. One that challenges and thrills.
Get creative and get moving.
Level Up Your Course: Engaging Design Tips
Designing a DIY obstacle course isn’t just about throwing some tires and ropes together. It’s about progressive difficulty and keeping everyone engaged. You can’t just set up one path and call it a day.

People get bored. You need options.
Think multiple routes. Easy, medium, hard. Let folks choose their challenge level.
Adjust heights and distances. Add a timed element. It keeps things spicy (and not just in the “ouch, I skinned my knee” way).
Ever considered skill-specific zones? A ‘strength zone’ with pull-up bars or an ‘agility zone’ with cone drills can shake things up. Keeps the mind and body guessing.
But here’s where many go wrong: ignoring long-term engagement. You must introduce new elements. Regularly.
Set personal goals and track progress. It’s rewarding to see how far you’ve come. People love that sense of accomplishment.
New obstacles, new challenges. Keeps things fresh and prevents the “I’ve done this a thousand times” syndrome.
Need more guidance? Check out this overview for a deeper dive into building courses for adults. Trust me, keeping it interesting is key.
Your course shouldn’t just sit there collecting dust.
Keep Your Course Strong: Tips for DIY Obstacle Safety
Maintaining a diy obstacle course isn’t just about keeping it fun. It’s about safety. Start with a routine inspection: Are the ropes fraying?
Is the hardware loose? You know they are. Tighten those bolts and reinforce what you can.
Replace any worn components immediately. Weatherproofing is key too (in case you forgot). Apply sealants to wood and cover elements during harsh conditions to shield them.
Remember to prepare for every season. Different weather, different challenges. Need a break from fixing up obstacles?
Dive into our Ultimate Backyard Stargazing Guide for a refreshing change.
Your Adventure Starts Here
You’ve got what it takes to build your own adventure. With a homemade challenge course, you can create a space that’s all about fun and growth.
No more waiting around for the perfect outdoor activities. This is about you customizing your experience.
Grab your sketchpad and start designing.
Gather your materials and unleash your creativity.
Turn your backyard into a proving ground with diy obstacle courses.
The rugged spirit of DIY adventure is calling.
So, what are you waiting for? Step outside and start building. Your adventure legacy awaits.